

Set up Visual Studio Code

Outline
- Download and install VS Code.
- See an overview of the user interface.
- Install support for your favorite programming language.
- Change your keyboard shortcuts and easily migrate from other editors using keymap extensions.
- Customize your editor with themes.
- Explore VS Code features in the Interactive Editor Playground.
Setting up Visual Studio Code (VS Code) is a straightforward process. Here's a step-by-step guide on how to do it:
1. Download and Install VS Code:
Go to the official website of Visual Studio Code (https://code.visualstudio.com/) and download the appropriate version for your operating system (Windows, macOS, or Linux). Install it following the installation wizard for your OS.

2. Launch VS Code:
After installation, launch Visual Studio Code by clicking on the application icon.
3. Extensions (Optional):
VS Code has a rich ecosystem of extensions that enhance its functionality. While not necessary, you can install extensions based on your preferences and the programming languages you use. To install extensions, click on the Extensions icon in the Activity Bar on the side (it looks like four squares) or use the keyboard shortcut `Ctrl+Shift+X` (Windows/Linux) or `Cmd+Shift+X` (macOS). Search for extensions and click "Install" for the ones you want.

4. User Settings (Optional):
You can customize VS Code to fit your needs by modifying the user settings. To access the settings, click on the gear icon in the lower-left corner and choose "Settings" or use the keyboard shortcut `Ctrl+,` (Windows/Linux) or `Cmd+,` (macOS). Here, you can modify various editor settings, keybindings, and extension settings.
5. Basic Usage:
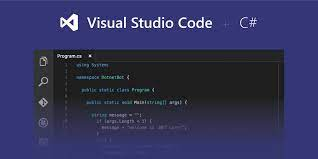
Familiarize yourself with the VS Code interface. It consists of the following components:
Menu Bar: Contains various menus like File, Edit, View, etc.
Activity Bar: On the side, it includes icons for File Explorer, Search, Source Control, Run & Debug, and Extensions.
Editor Area: Where you write your code.
Sidebar: Contains the File Explorer and other panels like Search, Source Control, etc.
Status Bar: At the bottom, shows information like line and column numbers, language mode, etc.
6. Opening a Project:
To open a project or folder, click on "File" in the Menu Bar, then "Open Folder." Navigate to the folder you want to open and click "Select Folder."
7. Writing Code:
Once you have your project open, you can start writing code in the editor area. VS Code supports syntax highlighting, auto-completion, and other helpful features for various programming languages.
8. Running and Debugging:
To run your code, use the integrated terminal or click on the "Run & Debug" icon in the Activity Bar. You can configure debugging settings for your project.
That's it! You've now set up and are ready to use Visual Studio Code for your coding projects. Remember that VS Code is highly customizable, so feel free to explore its settings and extensions to make it work best for you.
Hi, I'm from unknown tech to help you in technology. support us by giving feedback or new topics.
thank you,
unknown tech.